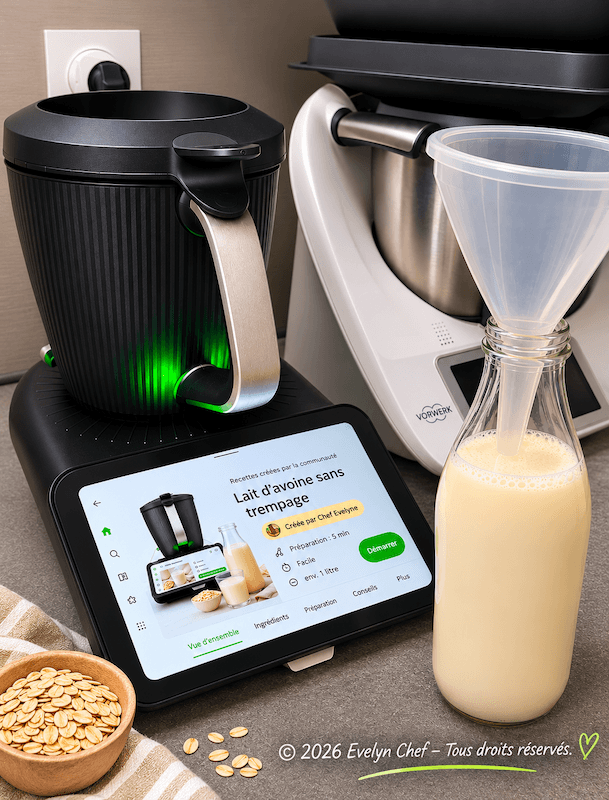
🥛 Lait d’avoine maison au Thermomix® TM7® : avec moins d’effet gélatineux 🥛
English at the end
J’adore faire mes préparations maison avec mon Thermomix, et le lait d’avoine ne fait pas exception !
Pourquoi acheter des briques de boisson végétale alors qu’avec une poignée de flocons d’avoine et de l’eau, on peut le préparer soi-même en quelques minutes ? C’est économique, on sait exactement ce qu’on met dedans et, en prime, on évite les emballages inutiles.
Mais voilà, tout ne s’est pas passé comme prévu ! 😅
J’ai commencé avec la recette Cookidoo®et, franchement, le résultat ne me convenait pas du tout. Mon lait était beaucoup trop gélatineux, presque gluant. J’avais beau faire tremper mes flocons d’avoine complets bio et les rincer plusieurs fois, rien n’y faisait.
Alors j’ai cherché à comprendre pourquoi et j’ai fait quelques essais. Et finalement, la solution était beaucoup plus simple que je ne l’imaginais : ne plus faire tremper les flocons !
Pourquoi faire son lait d’avoine maison ?
Déjà, pour le prix ! Avec seulement 60-80 g de flocons, on prépare presque un litre de lait végétal. Quand on compare au prix des briques dans le commerce, les économies sont intéressantes.
Ensuite, pour les ingrédients. Pas de sucre ajouté, pas d’arômes ni de conservateurs : simplement de l’avoine et de l’eau. C’est aussi une excellente alternative pour ceux qui, comme moi, ne consomment pas de lactose.
Et puis, j’aime l’idée de préparer juste ce dont j’ai besoin, de réutiliser mes bouteilles en verre et même de récupérer la pulpe pour faire des pancakes ou des biscuits.
Bref, que des bonnes raisons de s’y mettre !
Ma recette au Thermomix® TM7®
Pour environ 1 litre avant filtration, il vous faut :
- 60 à 80 g de flocons d’avoine complets bio
- 1 000 g d’eau très froide, idéalement sortie du réfrigérateur
- Une petite pincée de sel, 2 dates et arome vanille si vous le souhaitez
La préparation
- Mettez directement les flocons d’avoine dans le bol du Thermomix. Inutile de les faire tremper ou de les rincer.
- Ajoutez l’eau très froide et éventuellement le sel.
- Mixez 15 à 20 secondes à vitesse 8, sans chauffer.
- Filtrez immédiatement avec un sac à lait végétal ou une étamine fine, sans trop presser la pulpe.
- Versez dans une bouteille propre et placez au réfrigérateur.
Et voilà, c’est terminé ! Pas de trempage la veille, pas de cuisson et presque pas de vaisselle.
Le lait se conserve de préférence 2 à 3 jours au réfrigérateur, à 4 °C maximum. Pensez simplement à secouer la bouteille avant de vous servir.
Mais pourquoi le trempage rend-il le lait si épais ?
C’est justement ce que je voulais comprendre !
Contrairement aux amandes, les flocons d’avoine n’ont pas besoin de tremper. Ils sont généralement déjà passés à la vapeur lors de leur fabrication et absorbent donc très rapidement l’eau.
L’avoine contient des fibres solubles, notamment les bêta-glucanes. Ces fibres sont intéressantes sur le plan nutritionnel, mais elles ont aussi une particularité : elles absorbent l’eau et donnent une texture visqueuse aux préparations.
Plus les flocons trempent, plus ces fibres ont le temps de s’hydrater. L’amidon peut également contribuer à épaissir le lait, surtout si on le chauffe.
Voilà pourquoi, malgré tous mes rinçages, je n’arrivais pas à obtenir la texture que je souhaitais !
Depuis, je privilégie une préparation rapide avec de l’eau très froide. Je mixe juste ce qu’il faut et je filtre aussitôt.
Attention toutefois, selon la marque des flocons et leur richesse en fibres, le résultat peut varier. Le lait d’avoine maison reste naturellement différent de celui du commerce.
Mes petites astuces en plus 💚
Si vous trouvez votre lait encore un peu trop épais ou pas assez epais, variés les quantité avec de 50 à 80 g de flocons pour un litre d’eau.
Évitez également de le chauffer si vous souhaitez qu’il reste bien fluide. Il peut épaissir assez rapidement à la chaleur.
Et surtout, ne jetez pas la pulpe récupérée après filtration ! Elle est parfaite pour enrichir une pâte à pancakes, des cookies ou un gâteau. Chez moi, on essaie de ne rien gaspiller ! J’ai melangé avec 2 bananes bien mures ecrasée et 10 minutes à l’air fryer ou friteuse à air chaud)
À vous de jouer !
Comme quoi, même avec une recette Cookidoo®, il faut parfois faire quelques ajustements pour obtenir exactement ce qu’on aime.
C’est d’ailleurs ce qui me plaît avec le Thermomix® : on teste, on adapte, on recommence et on finit par trouver sa petite recette personnelle.
Si vous aussi vous avez déjà obtenu un lait d’avoine trop gélatineux, essayez cette méthode et venez me raconter ce que vous en pensez !
Bonne préparation et à très vite pour de nouvelles expériences gourmandes ! 🥰
Evelyn Chef
© 2026 Evelyn Chef – Tous droits réservés.
Thermomix® et Cookidoo® sont des marques déposées de Vorwerk. Recette personnelle non officielle.
English Version:
Homemade Oat Milk with the Thermomix® TM7 – No Soaking, No Slimy Texture! 🥛
I love making things from scratch with my Thermomix, and oat milk is no exception!
Why buy cartons of plant-based milk when you can make your own in just a few minutes with a handful of rolled oats and some water? It’s budget-friendly, you know exactly what’s going into it, and as a bonus, you’re cutting down on unnecessary packaging.
But here’s the thing… it didn’t quite go as planned! 😅
I started with the Cookidoo® recipe, and to be perfectly honest, I wasn’t happy with the results at all. My oat milk turned out way too thick and gelatinous, almost slimy! No matter how long I soaked my organic whole-grain rolled oats or how many times I rinsed them, nothing seemed to help.
So I decided to figure out what was going wrong and started experimenting. And guess what? The solution turned out to be much simpler than I expected: skip the soaking altogether!
Why Make Your Own Oat Milk?
First of all, it saves money! With just 60–80 g (about ½–¾ cup) of rolled oats, you can make nearly a liter (about 4 cups) of plant-based milk. Compared to store-bought cartons, the savings can really add up.
Then there’s the ingredient list. No added sugar, artificial flavors, or preservatives—just oats and water. It’s also a great dairy-free alternative for anyone who, like me, avoids lactose.
I also love being able to make just what I need, reuse my glass bottles, and even save the leftover oat pulp to make pancakes or cookies.
Honestly, what’s not to love?
My Thermomix® TM7 Oat Milk Recipe
Makes: Approximately 1 liter (about 4 cups) before straining
Ingredients
- 60–80 g organic whole-grain rolled oats (approximately ½–¾ cup)
- 1,000 g (1 liter / about 4¼ US cups) very cold water, preferably straight from the refrigerator
- Optional: a pinch of salt, 2 pitted dates, and a splash of vanilla extract
Instructions
- Add the oats: Place the rolled oats directly into the Thermomix mixing bowl. No soaking or rinsing needed!
- Add the water: Pour in the very cold water, along with the salt, dates, and vanilla if you’re using them.
- Blend: Mix for 15–20 seconds / Speed 8, with no heat.
- Strain immediately: Pour the mixture through a nut milk bag or fine cheesecloth. Let it drain without squeezing the pulp too hard.
- Store: Transfer your freshly made oat milk to a clean bottle and refrigerate immediately.
And that’s it! No overnight soaking, no cooking, and hardly any cleanup.
For the best freshness, keep your oat milk refrigerated at 40°F (4°C) or below and use it within 2–3 days.
Just give the bottle a good shake before pouring, since homemade oat milk naturally separates.
So, Why Does Soaking Make Oat Milk So Thick?
That’s exactly what I wanted to figure out!
Unlike almonds, rolled oats don’t need to be soaked before making plant-based milk. They’re typically steamed during processing, which means they absorb water very quickly.
Oats contain soluble fiber, particularly beta-glucans. These fibers offer nutritional benefits, but they also have an interesting characteristic: they absorb water and create a thick, somewhat viscous texture.
The longer the oats soak, the more time these fibers have to hydrate. Starch can also contribute to thickening, especially when the milk is heated.
That explains why, despite all my rinsing, I couldn’t get the smooth, pourable consistency I was looking for!
Now I stick to a quick preparation using very cold water. I blend just long enough to break down the oats and strain the mixture right away.
Keep in mind that results can vary depending on the brand of oats and their fiber content. Homemade oat milk will naturally have a different texture from commercial versions, which are often processed to achieve a smoother consistency.
A Few Extra Tips from My Kitchen 💚
Adjust the thickness to your liking!
If your oat milk is too thick—or not creamy enough—simply adjust the amount of oats. Try anywhere from 50 to 80 g per liter of water, depending on your preferred consistency.
Be careful when heating it!
If you want your oat milk to stay nice and pourable, avoid heating it too much. The starch can cause it to thicken surprisingly quickly.
And whatever you do, don’t throw away the leftover oat pulp!
It’s perfect for adding to pancakes, cookies, muffins, or cakes.
In my kitchen, I try not to waste anything!
Here’s something I tried with mine: I mixed the leftover oat pulp with two very ripe, mashed bananas, then popped the mixture into my air fryer for about 10 minutes.
Such an easy way to turn leftovers into a little homemade treat! The exact cooking time will depend on the amount of pulp and the thickness of the mixture.
Now It’s Your Turn! 🥰
Sometimes, even when you’re following a Cookidoo® recipe, a few little adjustments can make all the difference.
And that’s one of the things I love most about my Thermomix®: you can experiment, make changes, try again, and eventually come up with a recipe that’s just right for you.
So, if you’ve ever ended up with oat milk that’s too thick, gummy, or downright slimy, give this no-soak method a try!
I’d love to hear how it turns out for you, so don’t forget to share your experience in the comments.
Happy cooking, and see you soon for more delicious kitchen adventures! 💚
Evelyn Chef
© 2026 Evelyn Chef – All rights reserved.
Thermomix® and Cookidoo® are registered trademarks of Vorwerk. This is an independent, unofficial recipe and is not affiliated with or endorsed by Vorwerk.

